Adding Algolia search to an Astro Static Website
Last time I added Meilisearch to an astro website. However, it remains some difficulties to search Japanese kanji properly, I also tried it with Algolia.
Algolia's free plan allows 10k documents and 10k searches per month. That's enough for personal use or small businesses, but it can be expensive for medium sized websites.
The code is almost the same as the case in Meilisearch.
- Create an Algolia account
- Installing algoliasearch in your Astro project
- Create an index and send it to Algolia
- Creating search form and result component
- Importing these components into the page template
- Styling
Working environment:
- Node v18.12.1
- Astro v2.0.11
- algoliasearch v4.14.3
- dotenv v16.0.3
This time we'll use one of the Algolia libraries "InstantSearch.js v4", which works with JavaScript.
Link What is InstantSearch.js? | Algolia
They offer the React library or Vue as well, though I haven't tried them this time.
Structure of the Astro Project
In this example, the Astro project structure is as follows;
src/
└─ pages/
     └─ posts/
          ├─ first-post.md
          ├─ second-post.md
          └─ ...
Also, the post Markdown YAML frontmatter is as follows;
src/posts/first-post.md
---
title: My first post
slug: first-post
---

dignissimos aperiam dolorem qui eum facilis quibusdam animi sint suscipit qui sint possimus cum quaerat magni maiores excepturi ipsam ut commodi dolor voluptatum modi aut vitae
Create an Algolia account
Algolia offers only cloud dashboard while Meilisearch offers on-premises version.
Let's start from "START FREE" on the top page
© Algolia
Confirm e-mail from Algolia.
Create an app on Algolia
The first time you log in, you will be taken to your first application settings.
You'll create an "index" in this application, then add a list of "records" for the search data.
I have named the index "devposts" here. Algolia recommends adding the prefix "dev" or "prod_" to the index name so that we can switch the index.
© Algolia
After you save your new application, go to Settings and rename the application.
© Algolia
© Algolia
© Algolia
Create an API key for records
While Algolia allows you to add records manually or by uploading a JSON/CSV file, this time we'll add records remotely.
API KEY is required to add records remotely.. Master admin KEY can also work, but it's better to use only-write/delete KEY for security reasons.
Open "All API keys" on the "API KEYS" page, and click "New API key".
© Algolia
Select the created index ("dev_posts") and choose
- addObject
- deleteObject
at the bottom of the ACL.
© Algolia
After you press "Create", make a note of your API.
Install algoliasearch and dotenv to the Astro
Now, we're working on your local Astro project.
To use Algolia on Astro, let's install algoliasearch.
# npm
npm install algoliasearch

# yarn
yarn add algoliasearch
Also, to use environment variables in a .js file, install dotenv.
# npm
npm install dotenv

# yarn
yarn add dotenv
Build records for the search
Next, create a .js file to build and send records to Algolia.
algoliasearch.jsunder thelibdirectory (file name and directory are up to you).envunder the project root
src/
├─ pages/
│    ├─ posts/
│    │    ├─ first-post.md
│    │    ├─ second-post.md
│    │    └─ ...
│    └─ lib/
│         └─ algoliasearch.js <-- this and
├─ .env <-- this
Edit .env file
Add environment variables to the .env file.
.env
ALGOLIA_APP_ID=xxxxxxxxxx
ALGOLIA_SEARCH_ONLY_API_KEY=xxxxxxxxxxxxxxxxxxxxxxxxxxxxxx
ALGOLIA_WRITE_API_KEY=xxxxxxxxxxxx
ALGOLIA_WRITE_API_KEY is the one you've created. You can see APP_ID and SEARCH_ONLY_API_KEY on API keys after pressing the Overview button.
© Algolia
© Algolia
Create algolia.js
Next, create a javascript file to send "records" to the index you've created on Algolia.
The base code
The base code to send a dataset to Algolia would be as follows;
import algoliasearch from "algoliasearch"
const client = algoliasearch("APP_ID", "WRITE_API_KEY")

client.initIndex("Index name").saveObjects("JSON data")
// .then((res) => console.log(res))
It is almost the same as Meilisearch with Algolia. We build the appropriate data from the markdown posts and send it to Algolia.
Import dotenv
At the top of algolia.js, enable dotenv.
src/lib/algolia.js
import * as dotenv from "dotenv"
dotenv.config()

// à suivre
Add the base code
Then, add the base code.
src/lib/algolia.js
// continued

import algoliasearch from "algoliasearch"
const client = algoliasearch(
  process.env.ALGOLIA_APP_ID,
  process.env.ALGOLIA_WRITE_API_KEY
)

// 1. Build records (explained later)

// 2. Send the records in JSON format
client
  .initIndex("dev_posts")
  .saveObjects("JSON data")
  .then(res => console.log(res)) //show the result
Build a dataset for the search
Next, build a dataset (= records) of documents.
This sample Astro project uses Markdown posts. If you are using a CMS, fetch the content instead of retrieving markdown files.
To remove markdown tags, I use remove-markdown. Please install it if necessary.
src/lib/algolia.js
// continued
// 1. Build a dataset
import fs from "fs"
import path from "path"
import matter from "gray-matter"
import removeMd from "remove-markdown"

const filenames = fs.readdirSync(path.join("./src/posts"))
const data = filenames.map(filename => {
  try {
    const markdownWithMeta = fs.readFileSync("./src/posts/" + filename)
    const { data: frontmatter, content } = matter(markdownWithMeta)
    return {
      objectID: frontmatter.slug,
      slug: frontmatter.slug,
      title: frontmatter.title,
      content: removeMd(content).replace(/\n/g, ""),
    }
  } catch (e) {
    // console.log(e.message)
  }
})

// 2. Send the dataset in JSON format
// ...
The keys on the code above are;
- Because
import.meta.glob()doesn't work, use fs・path・matter (no installation required) objectIDis required, but we can use saveObjects() for automatic generation instead. This time I used the slug as theobjectID.- By
content,I added the full text. You can useslice()to make it shorter or use an excerpt instead.
Send the records
Format the records data in JSON format and put it in saveObjects().
src/lib/algolia.js
// continued

// 2. Send the dataset in JSON format
client
  .initIndex("dev_posts")
  .saveObjects(JSON.parse(JSON.stringify(data)))
  .then(res => console.log(res))
The whole code of algolia.js
src/lib/algolia.js
import * as dotenv from "dotenv"
dotenv.config()

import algoliasearch from "algoliasearch"
const client = algoliasearch(
  process.env.ALGOLIA_APP_ID,
  process.env.ALGOLIA_WRITE_API_KEY
)

// 1. Build a dataset
import fs from "fs"
import path from "path"
import matter from "gray-matter"
import removeMd from "remove-markdown"

const filenames = fs.readdirSync(path.join("./src/posts"))
const data = filenames.map(filename => {
  try {
    const markdownWithMeta = fs.readFileSync("./src/posts/" + filename)
    const { data: frontmatter, content } = matter(markdownWithMeta)
    return {
      id: frontmatter.slug,
      title: frontmatter.title,
      content: removeMd(content).replace(/\n/g, ""),
    }
  } catch (e) {
    // console.log(e.message)
  }
})

// 2. Send the dataset in JSON format
client
  .initIndex("dev_posts")
  .saveObjects(JSON.parse(JSON.stringify(data)))
  .then(res => console.log(res))
Now, algolia.js is done!
Execute algolia.js with Node
Once algolia.js is ready, run it with Node.
At the root of the Astro project, run the following code. *If you put the file in a different directory, execute that file.
bash
node src/lib/algolia.jsOnce the records are sent without error, you'll see the result thrown by console.log(res) added at the end of algolia.js.
bash
{
  taskIDs: [ 125508379002 ],
  objectIDs: [ 'third-post', 'second-post', 'first-post' ]
}
Then, go to the Algolia dashboard and see the index. Yes, the dataset (of records) has been indexed.🙂
© Algolia
Create a component for the search box and search result
Finally, let's display a search box and the search result.
Create a component file named Search.astro (the name is up to you) under the components directory.
src/
├─ components/
│    └─ Search.astro <-- this
├─ pages/
│    ├─ posts/
│    │    ├─ first-post.md
│    │    ├─ second-post.md
│    │    └─ ...
│    └─ lib/
│         └─ algoliasearch.js
├─ .env
It is almost the same when I integrated Meilisearch into Astro.
src/components/Search.astro
<div class="wrapper">
  <div id="searchbox"></div>
  <div id="hits"></div>
</div>

<script
  is:inline
  src="https://cdn.jsdelivr.net/npm/[email protected]/dist/algoliasearch-lite.umd.js"
  integrity="sha256-dImjLPUsG/6p3+i7gVKBiDM8EemJAhQ0VvkRK2pVsQY="
  crossorigin="anonymous"
></script>
<script
  is:inline
  src="https://cdn.jsdelivr.net/npm/[email protected]/dist/instantsearch.production.min.js"
  integrity="sha256-3s8yn/IU/hV+UjoqczP+9xDS1VXIpMf3QYRUi9XoG0Y="
  crossorigin="anonymous"
></script>
<script is:inline>
  const search = instantsearch({
    indexName: 'dev_posts',
    searchClient: algoliasearch(
      import.meta.env.ALGOLIA_APP_ID,
      import.meta.env.ALGOLIA_SEARCH_ONLY_API_KEY
    ),
  })
  search.addWidgets([
    instantsearch.widgets.searchBox({
      container: '#searchbox',
    }),

    instantsearch.widgets.hits({
      container: '#hits',
      templates: {
        item: `
          <a href='/{{#helpers.highlight}}{ "attribute": "slug" }{{/helpers.highlight}}/'>
            <h2 class="hit-name">
              {{#helpers.highlight}}{ "attribute": "title" }{{/helpers.highlight}}
            </h2>
            <p>{{#helpers.highlight}}{ "attribute": "content" }{{/helpers.highlight}}...</p>
          </a>
      `,
      },
    }),
  ])
  search.start()
</script>
Warning⚠️ When we use external CDN scripts on Astro, we have to run CDN and our scripts with is:inline. It loses page speed because they are inserted between HTML tags.
Now, import this component inside other components or page templates.
The display would be like this;
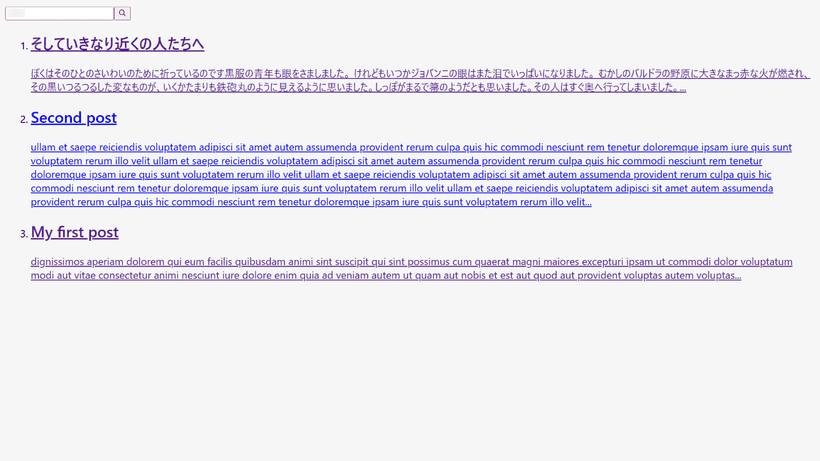
It would be better to import Search.astro inside a Modal component for a practical case. (Right before the body closing tag would be better.)
Style the component
There are a few options to style the Algolia component.
- Check the class names and style them by yourselves
- Import reset.css or satellite.css (by npm install or by CDN)
Check the class names and style them by yourselves
For the classes not indicated on HTML in .astro files, apply is:global for the <style></style> tag.
src/components/Search.astro
<!-- continued -->

<style is:global>
  .ais-Hits-item {
    margin-bottom: 1em;
  }
</style>
satellite.css by Algolia Official
Reference Style your widgets | Algolia
in case of using package
bash
# npm
npm install instantsearch.css

# yarn
yarn add instantsearch.css
src/components/Search.astro
---
// Include only the reset.css
import 'instantsearch.css/themes/reset.css'
// or include the full Satellite theme
import 'instantsearch.css/themes/satellite.css'
---

<div class="wrapper">
  <div id="searchbox"></div>
  <div id="hits"></div>
</div>

// ...
in case of CDN
<link
rel="stylesheet"
href="https://cdn.jsdelivr.net/npm/[email protected]/themes/satellite-min.css"
integrity="sha256-TehzF/2QvNKhGQrrNpoOb2Ck4iGZ1J/DI4pkd2oUsBc="
crossorigin="anonymous"
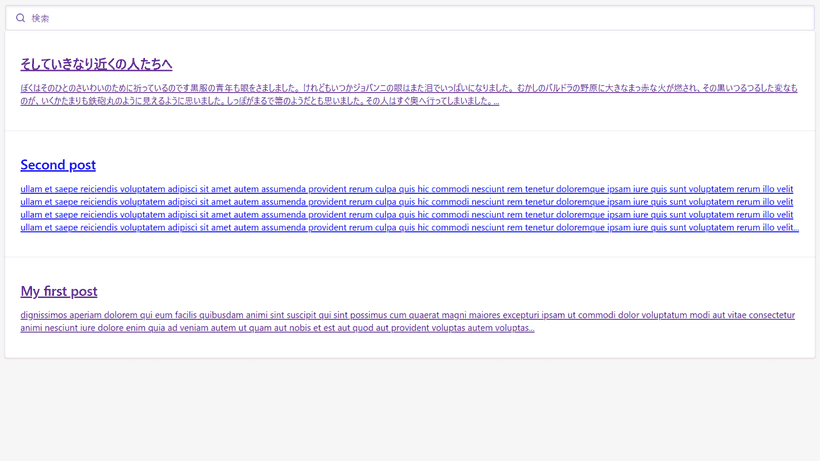
/>Styled example
Language settings
To make the search engine work well in your language, edit the language settings.
Open the "Configuration" tab of Index at the left menu, then go to "Language".
Add your language (here, I added "Japanese") to "Index Languages" and "Query Languages" then save.
© Algolia
Conclusion
I've not tried React/Vue libraries this time, but they might be easier with Astro.
Because switching Algolia to Meilisearch is so easy, it's possible to try Algolia first and then immigrate to Meilisearch later.